Connect Tom Lab - Mac
A Step-by-Step Guide for macOS Users

Introduction
Welcome to the official guide for connecting your Mac to the Tom Lab platform. This tutorial will walk you through setting up a secure connection using an SSH key and a WireGuard VPN tunnel. In just a few minutes, you'll have direct terminal access to your own private lab environment. Let's get started! 🚀
Step 1: Generate Your SSH Key
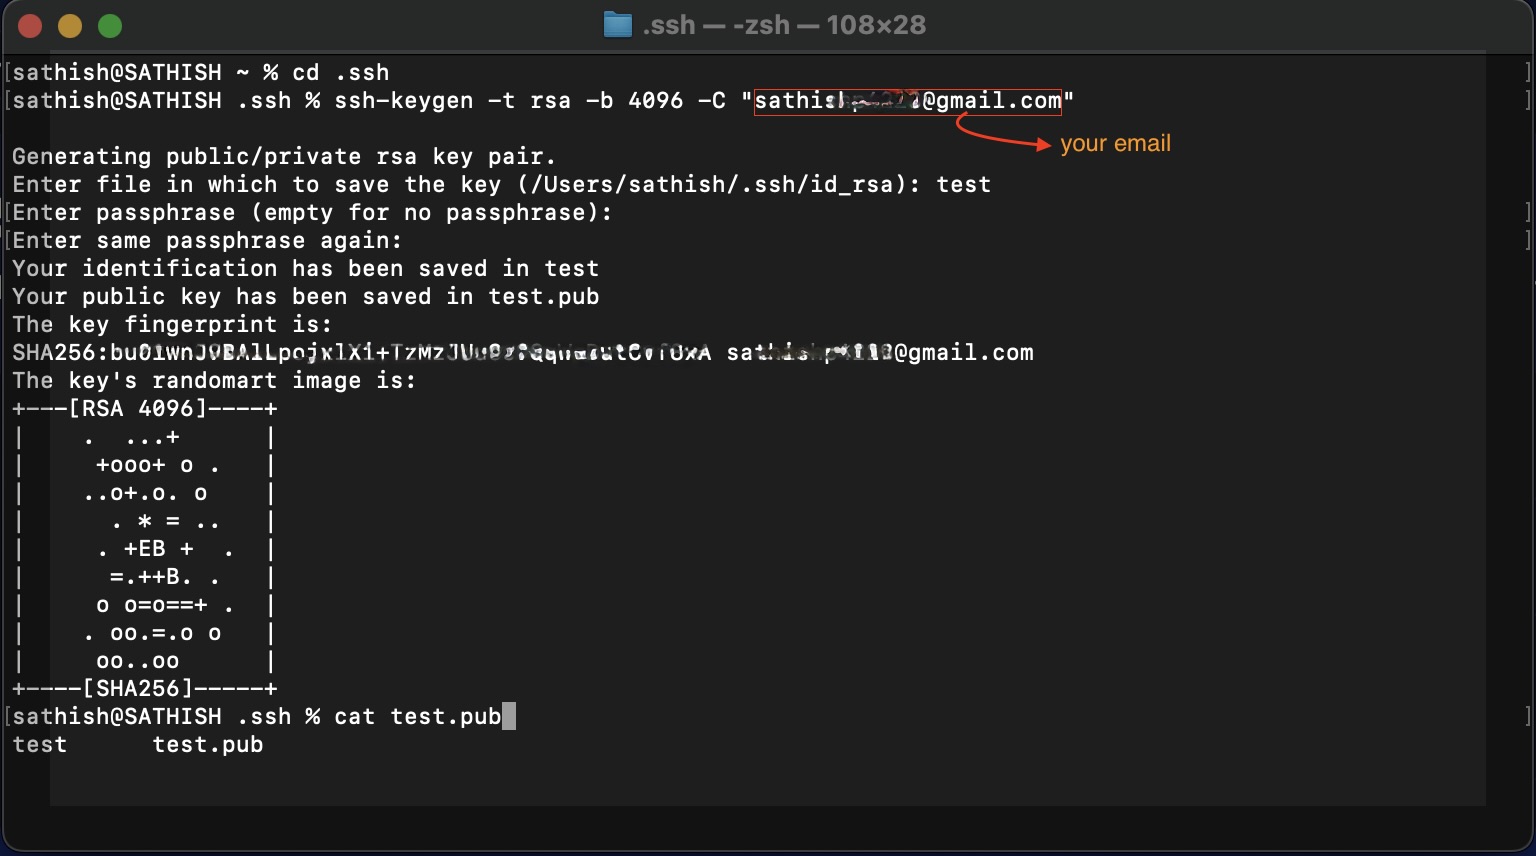
An SSH key provides a secure way to log into your lab without needing a password. If you don't have one, you can easily create a new one. Open the Terminal app on your Mac and enter the command below. We recommend a 4096-bit RSA key for excellent security. Remember to replace the email with your own.
ssh-keygen -t rsa -b 4096 -C "your_email@example.com"
Press Enter to accept the default file location and optionally add a passphrase for extra security.
Step 2: Add Your SSH Public Key to Tom Lab
Next, you need to give Tom Lab your public key. This allows our system to recognize you. First, display the key in your terminal with this command:
cat ~/.ssh/id_rsa.pub
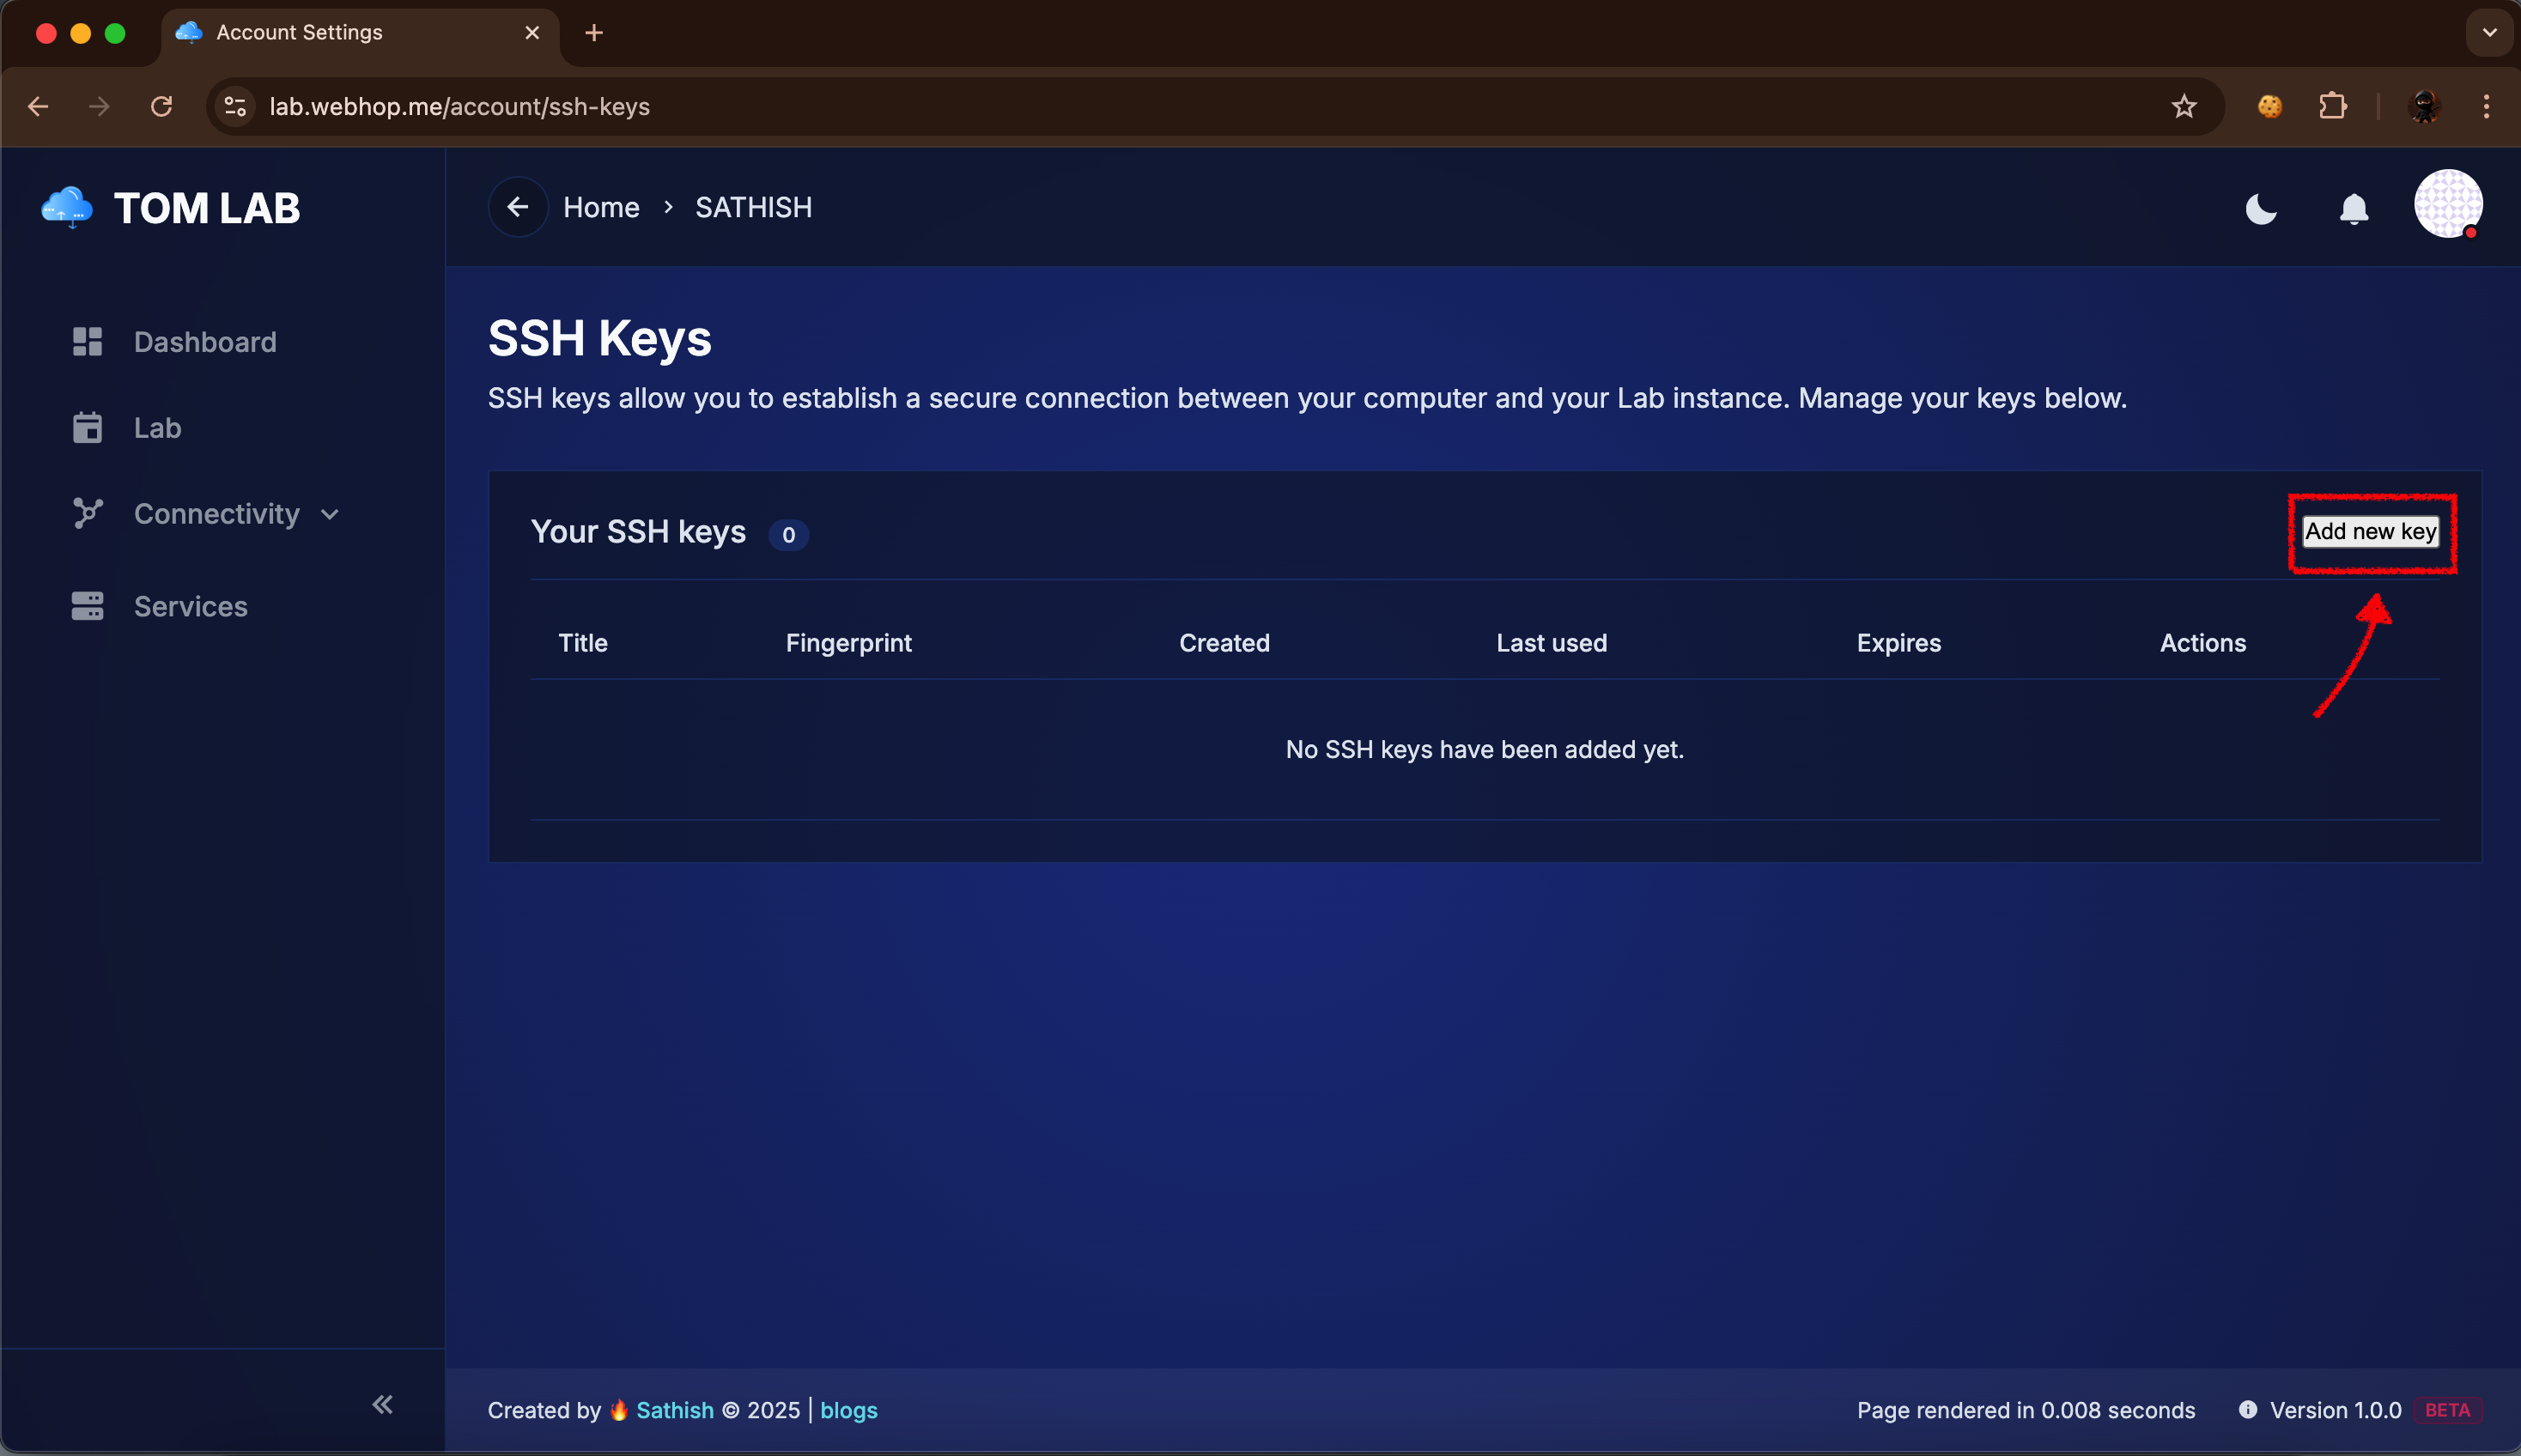
Copy the entire output. Now, in your Tom Lab account, navigate to SSH Keys (under your profile menu) and click Add new key. Paste your key, give it a title, and save it.
Step 3: Create and Configure Your VPN Device
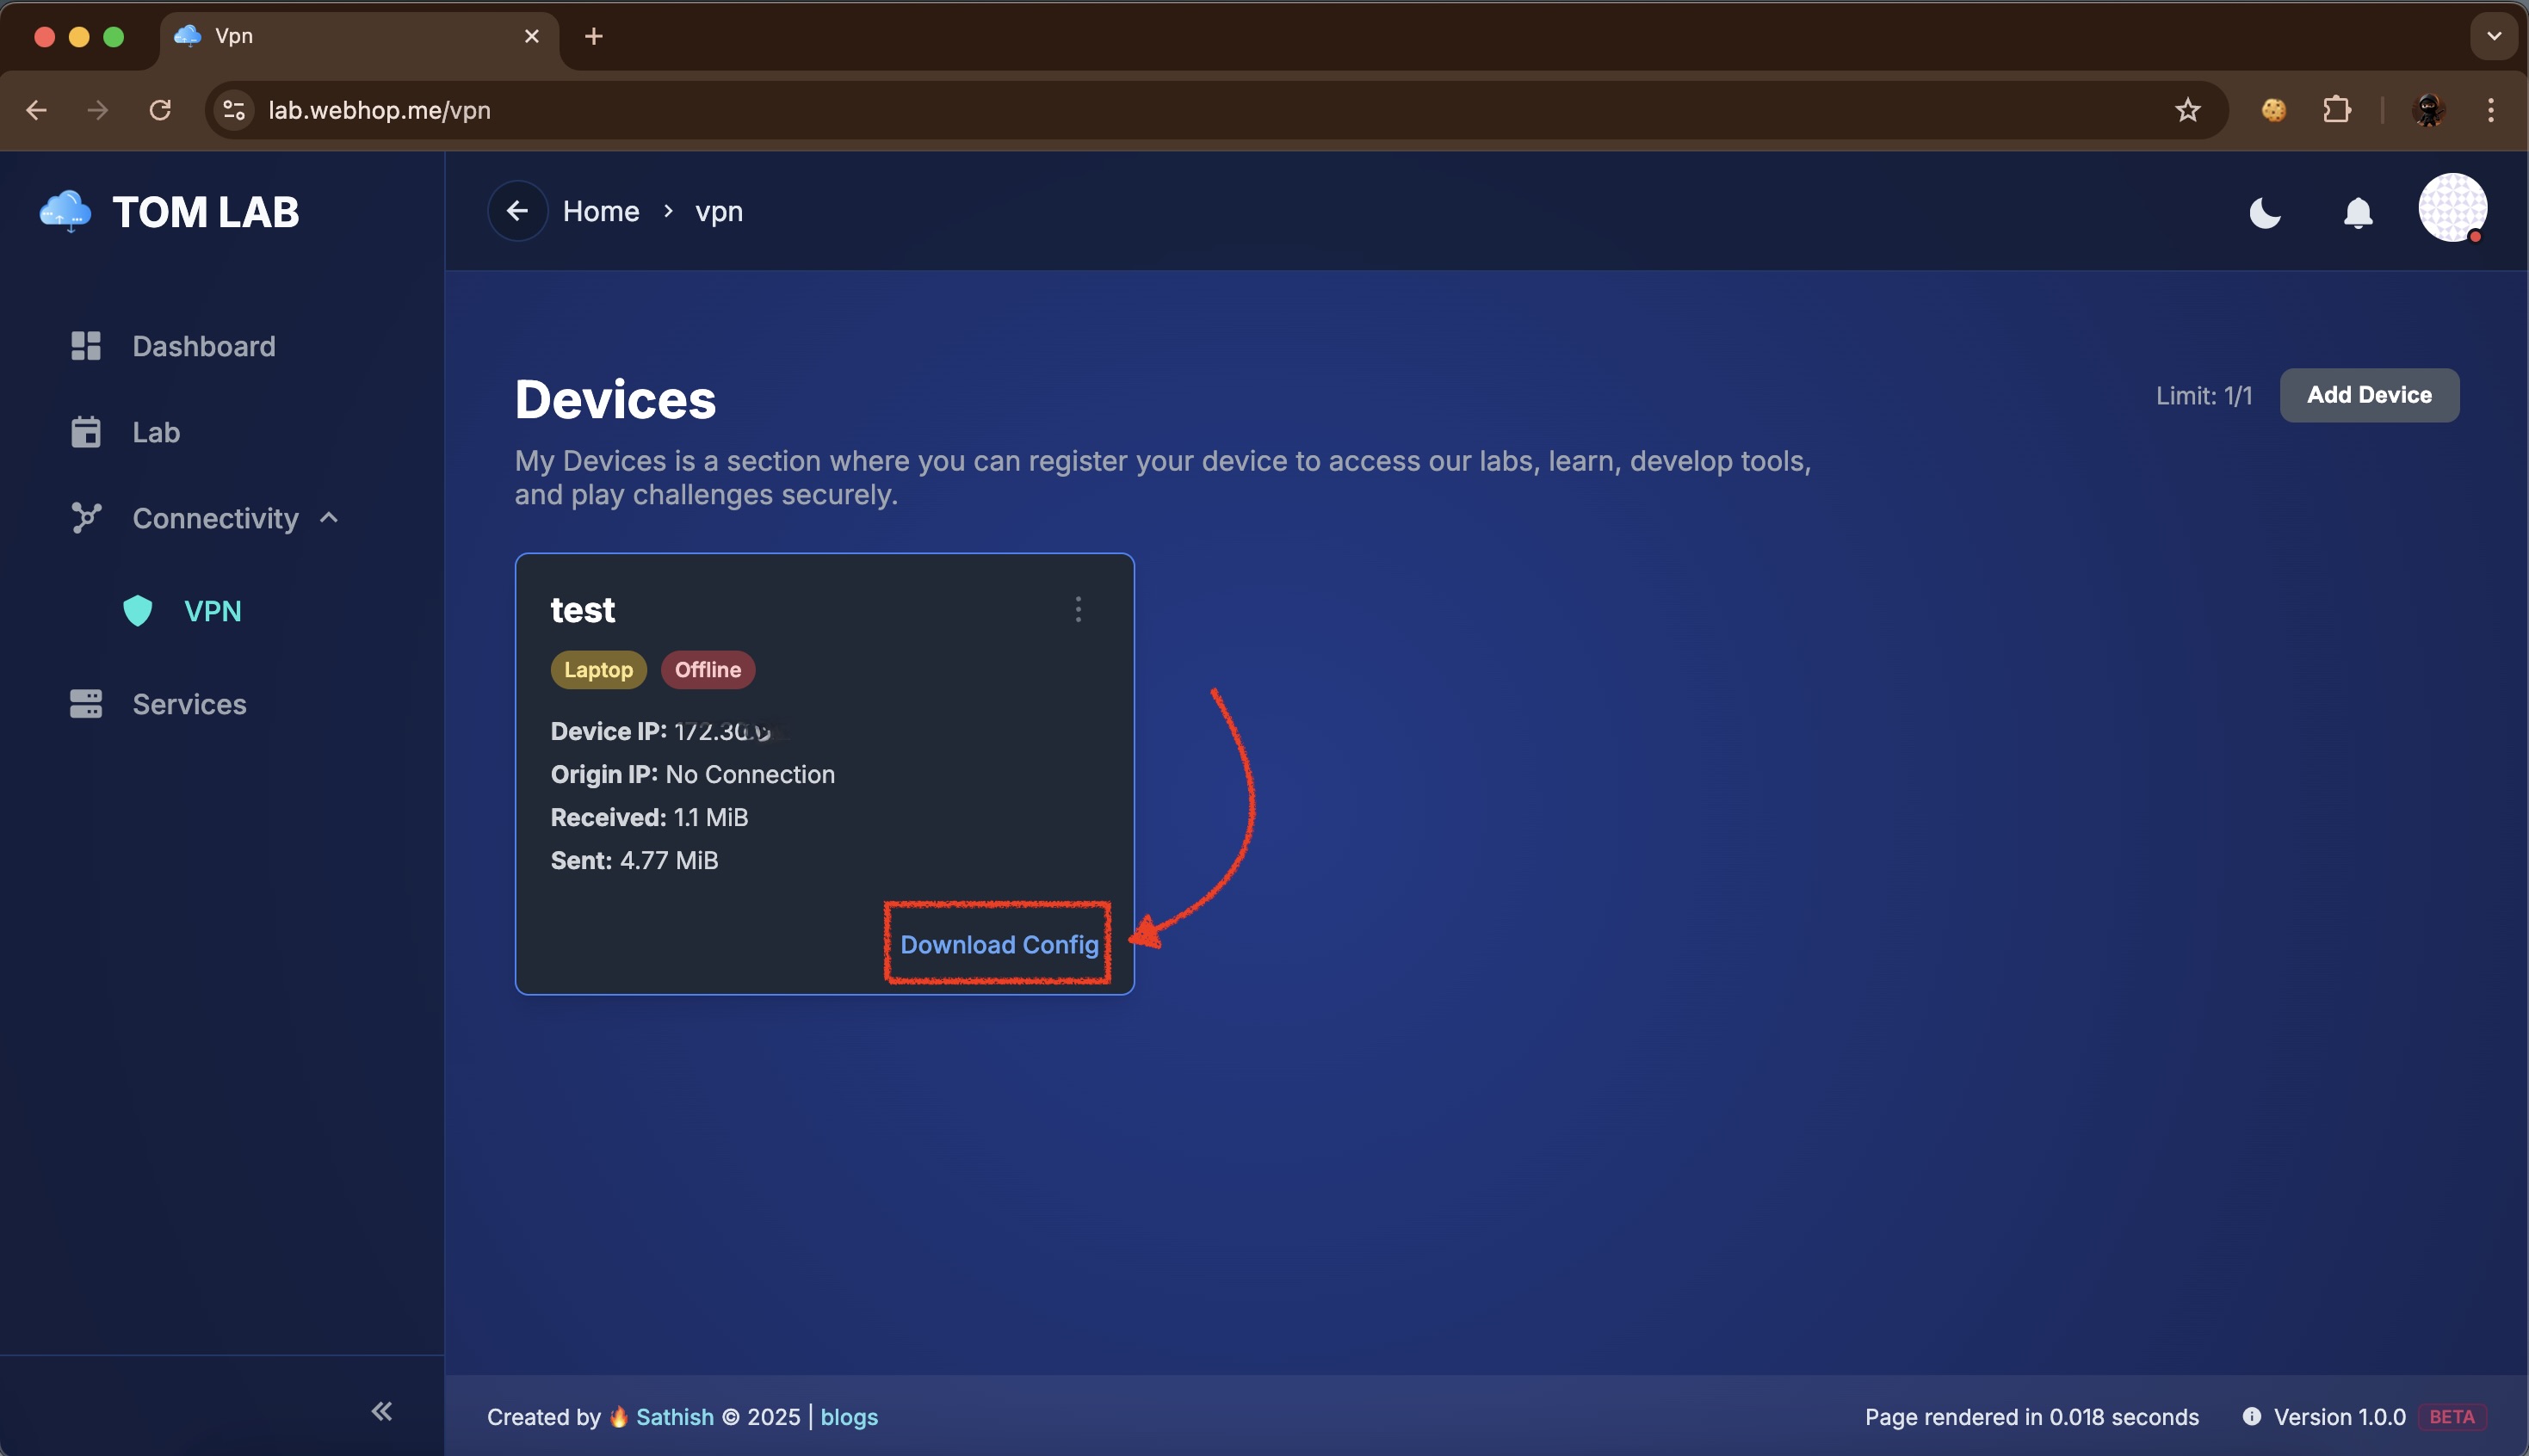
A VPN connection places your Mac on the same private network as your lab. Go to Connectivity → VPN and click Add Device. Give it a name like "My MacBook" and click Verify and Add. Once the device is created, click Download Config.
Step 4: Activate the VPN Connection
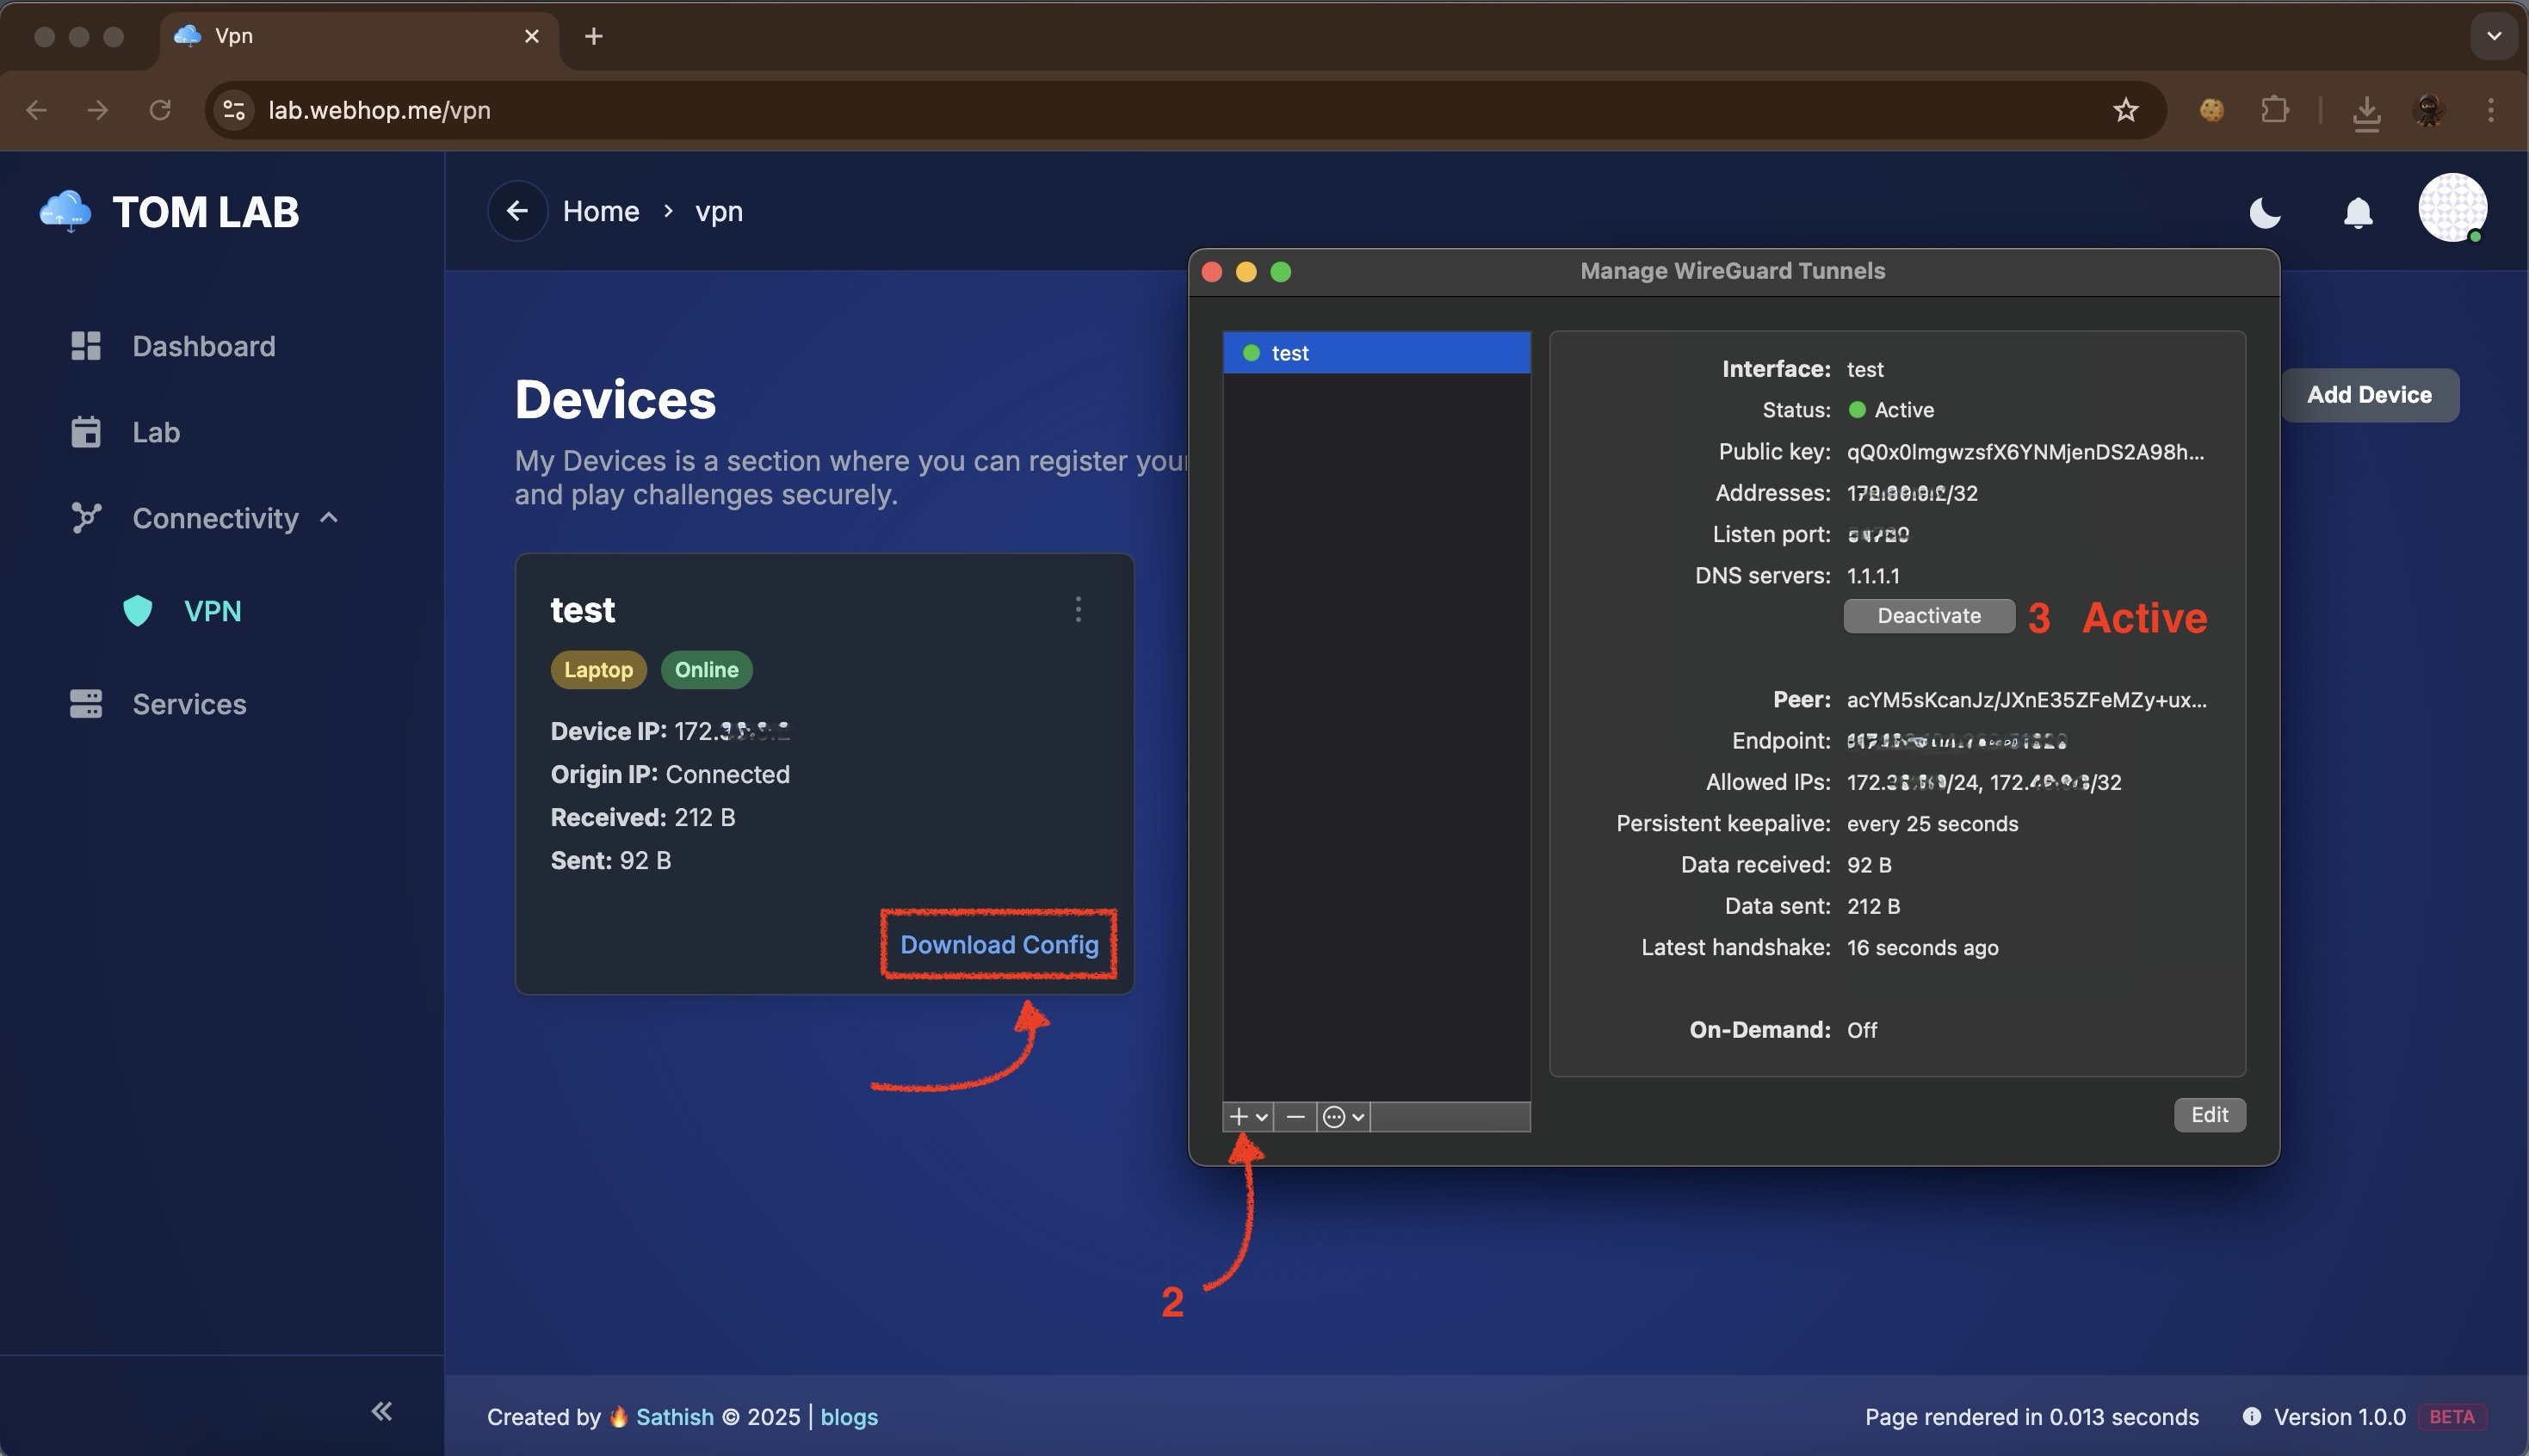
You'll need the official WireGuard app from the App Store. Once installed, open it and click Import tunnel(s) from file, selecting the .conf file you just downloaded. Click Activate. The status will turn green, and your dashboard will show the device as "Online".
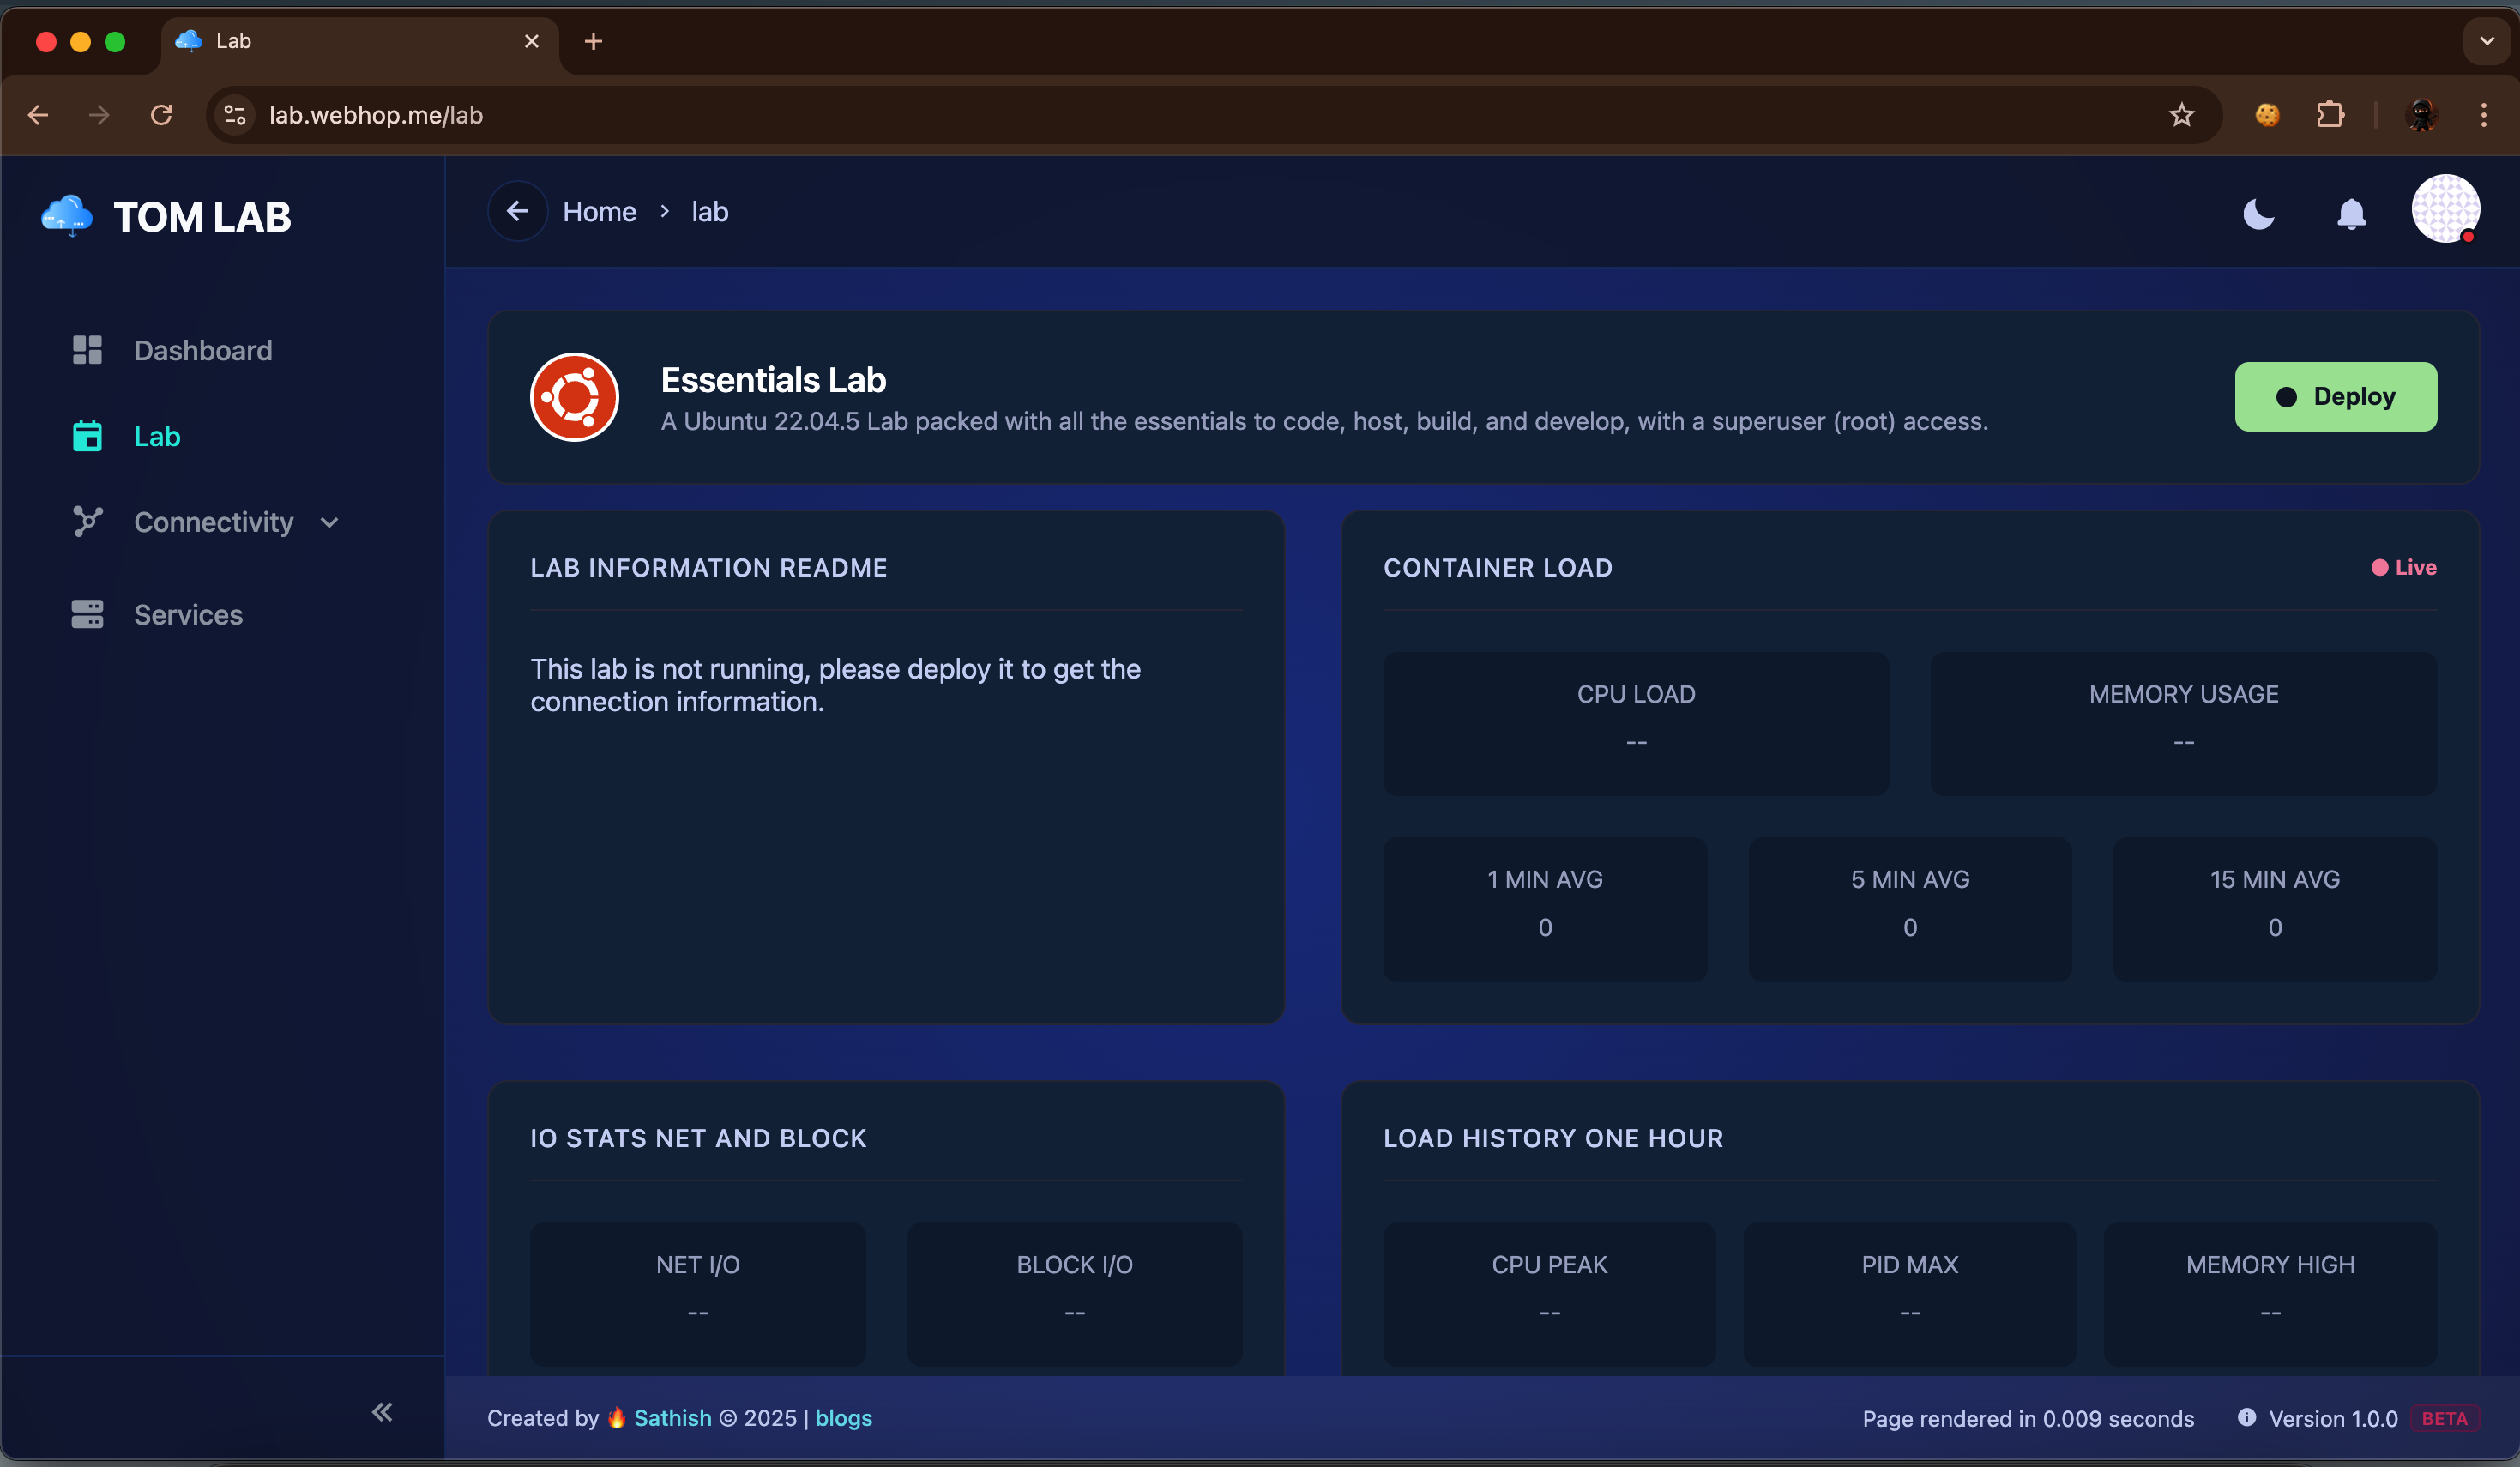
Step 5: Deploy Your Lab
Now for the fun part! Navigate to the Lab section and click the Deploy button. The system will prepare your personal Ubuntu container. Once it's ready, the dashboard will come alive with live stats and your connection details.

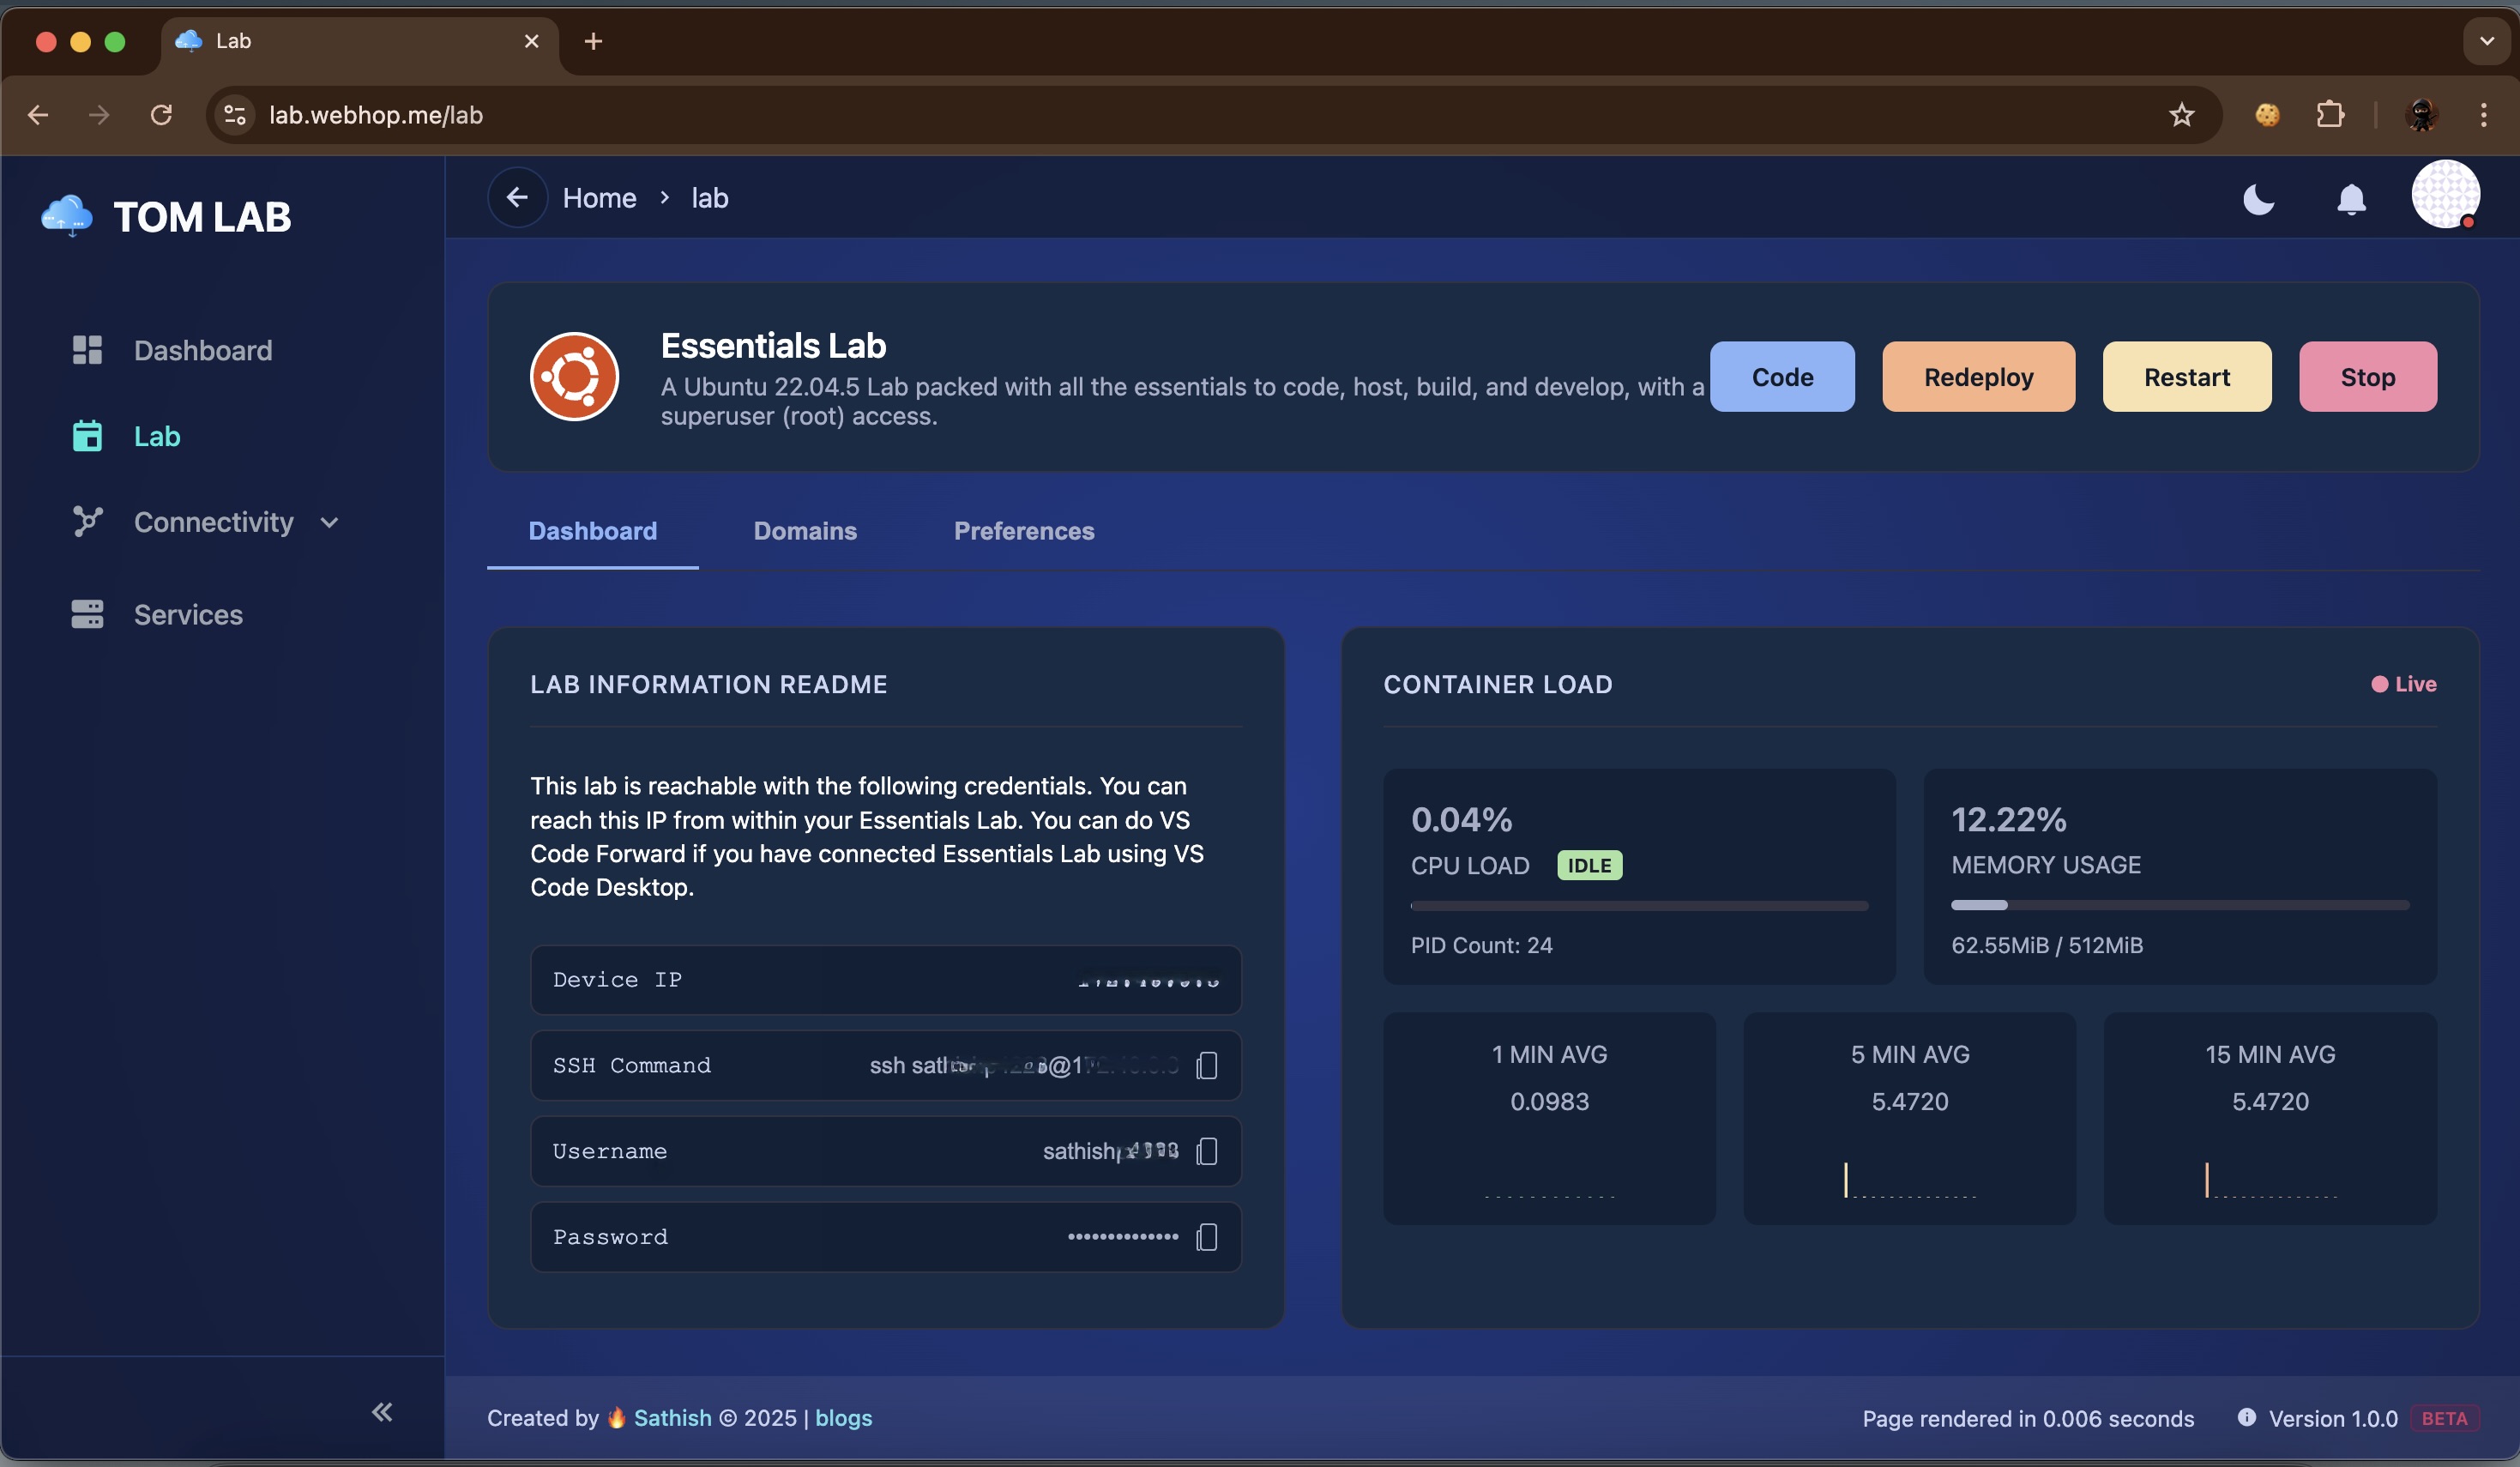
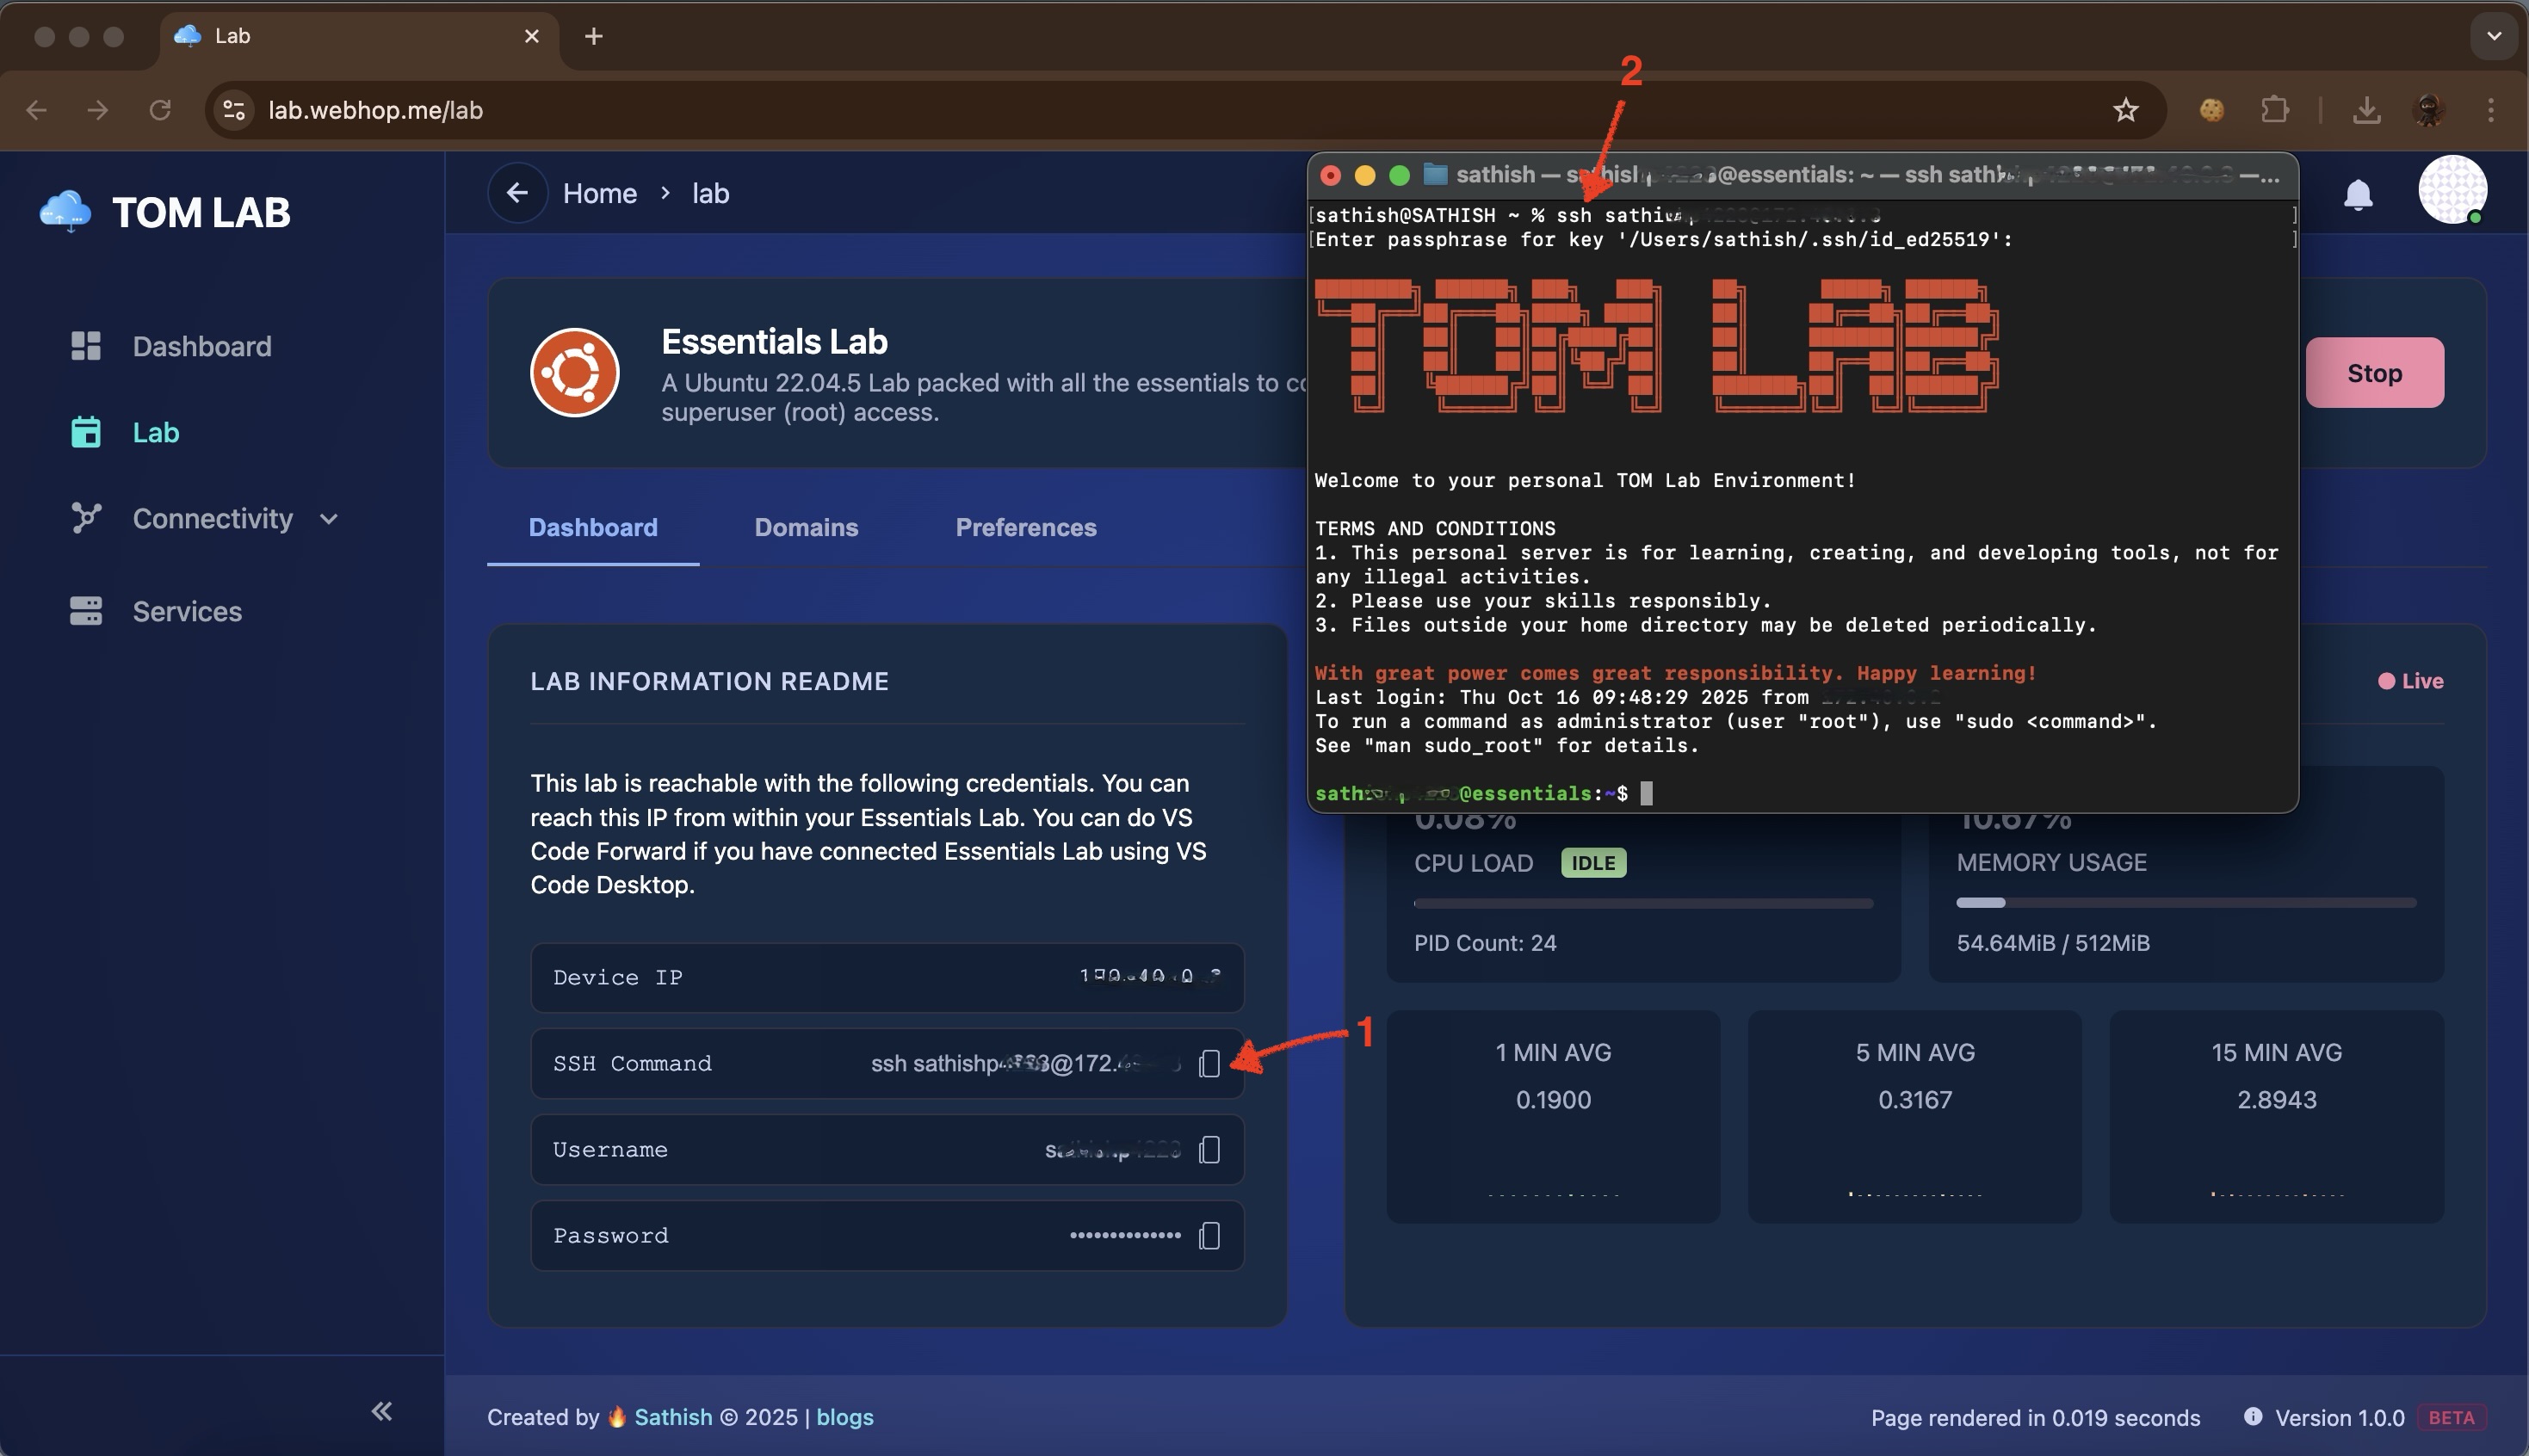
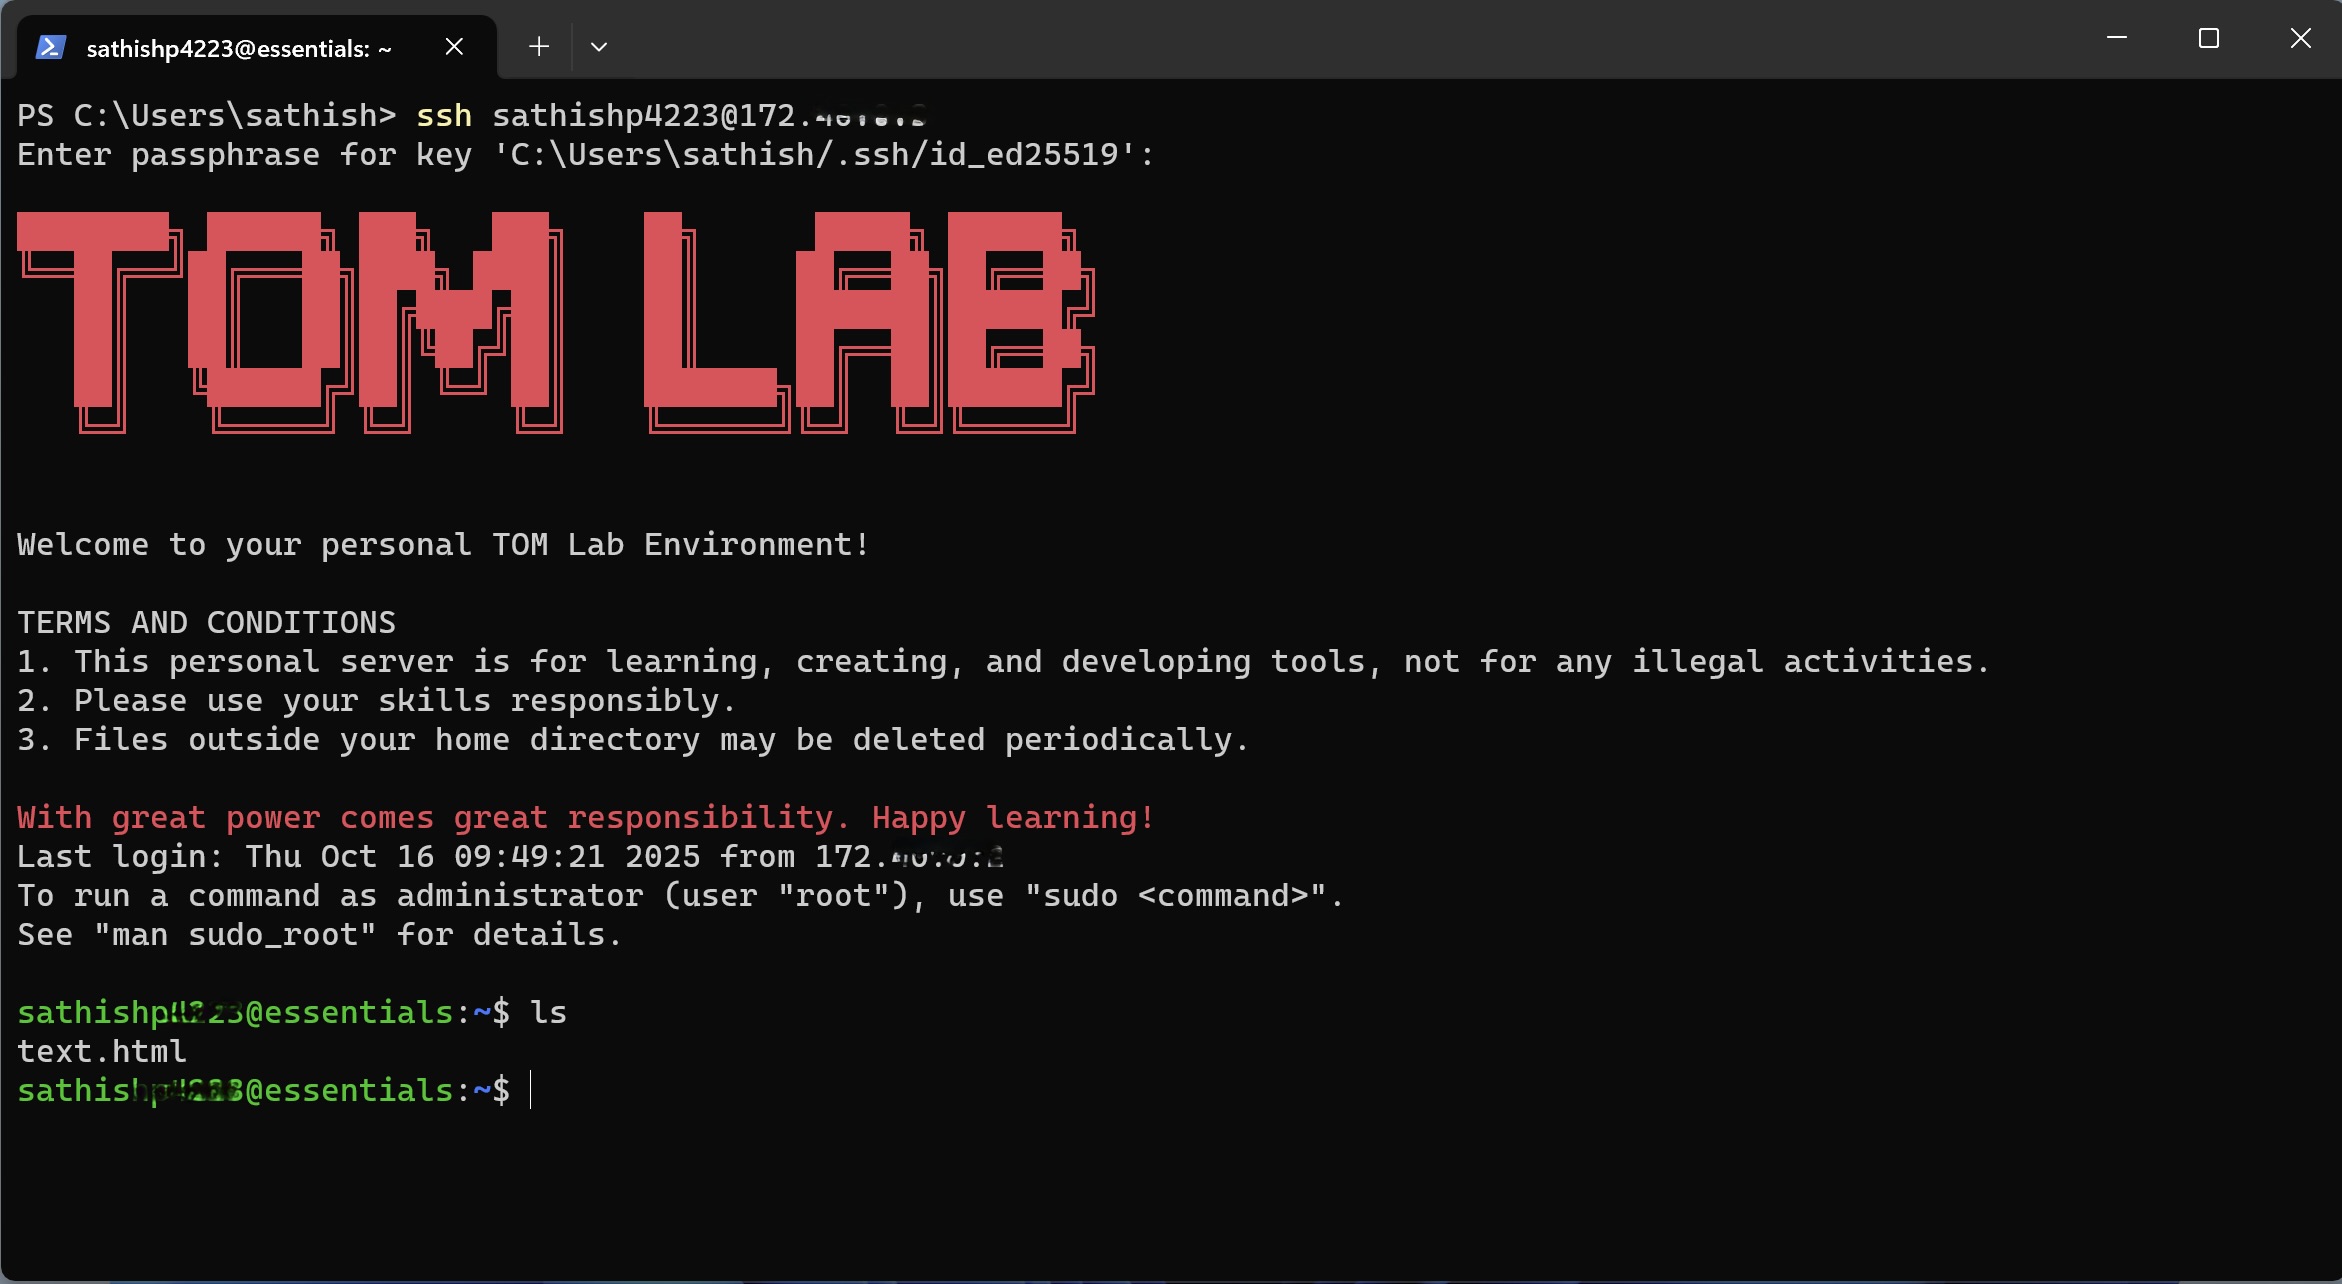
Step 6: Connect via SSH!
With the VPN active and the lab deployed, you're ready to connect. The Lab dashboard provides the exact SSH Command you need. Click the copy icon next to the command, paste it into your Mac's Terminal, and press Enter. You will be logged right in!
✅ Success!
Congratulations, you are now connected to your Tom Lab environment. Happy coding!
Connect Tom Lab - Windows
A Step-by-Step Guide for Windows Users

Introduction
This guide will show you how to securely connect your Windows machine to your Tom Lab environment. We'll use the built-in Windows PowerShell to create an SSH key for secure login and the WireGuard application to establish a private VPN connection. Let's begin! 💻
Step 1: Generate Your SSH Key in PowerShell
Windows 10 and 11 include a native SSH client. We can use it to create a secure key pair. Open PowerShell and run the command below. We're using ED25519, which is modern and highly secure. Replace the email with your own.
ssh-keygen -t rsa -b 4096 -C "your_email@example.com"
Press Enter to save the key in the default location. We strongly recommend adding a memorable passphrase when prompted for an extra layer of security.
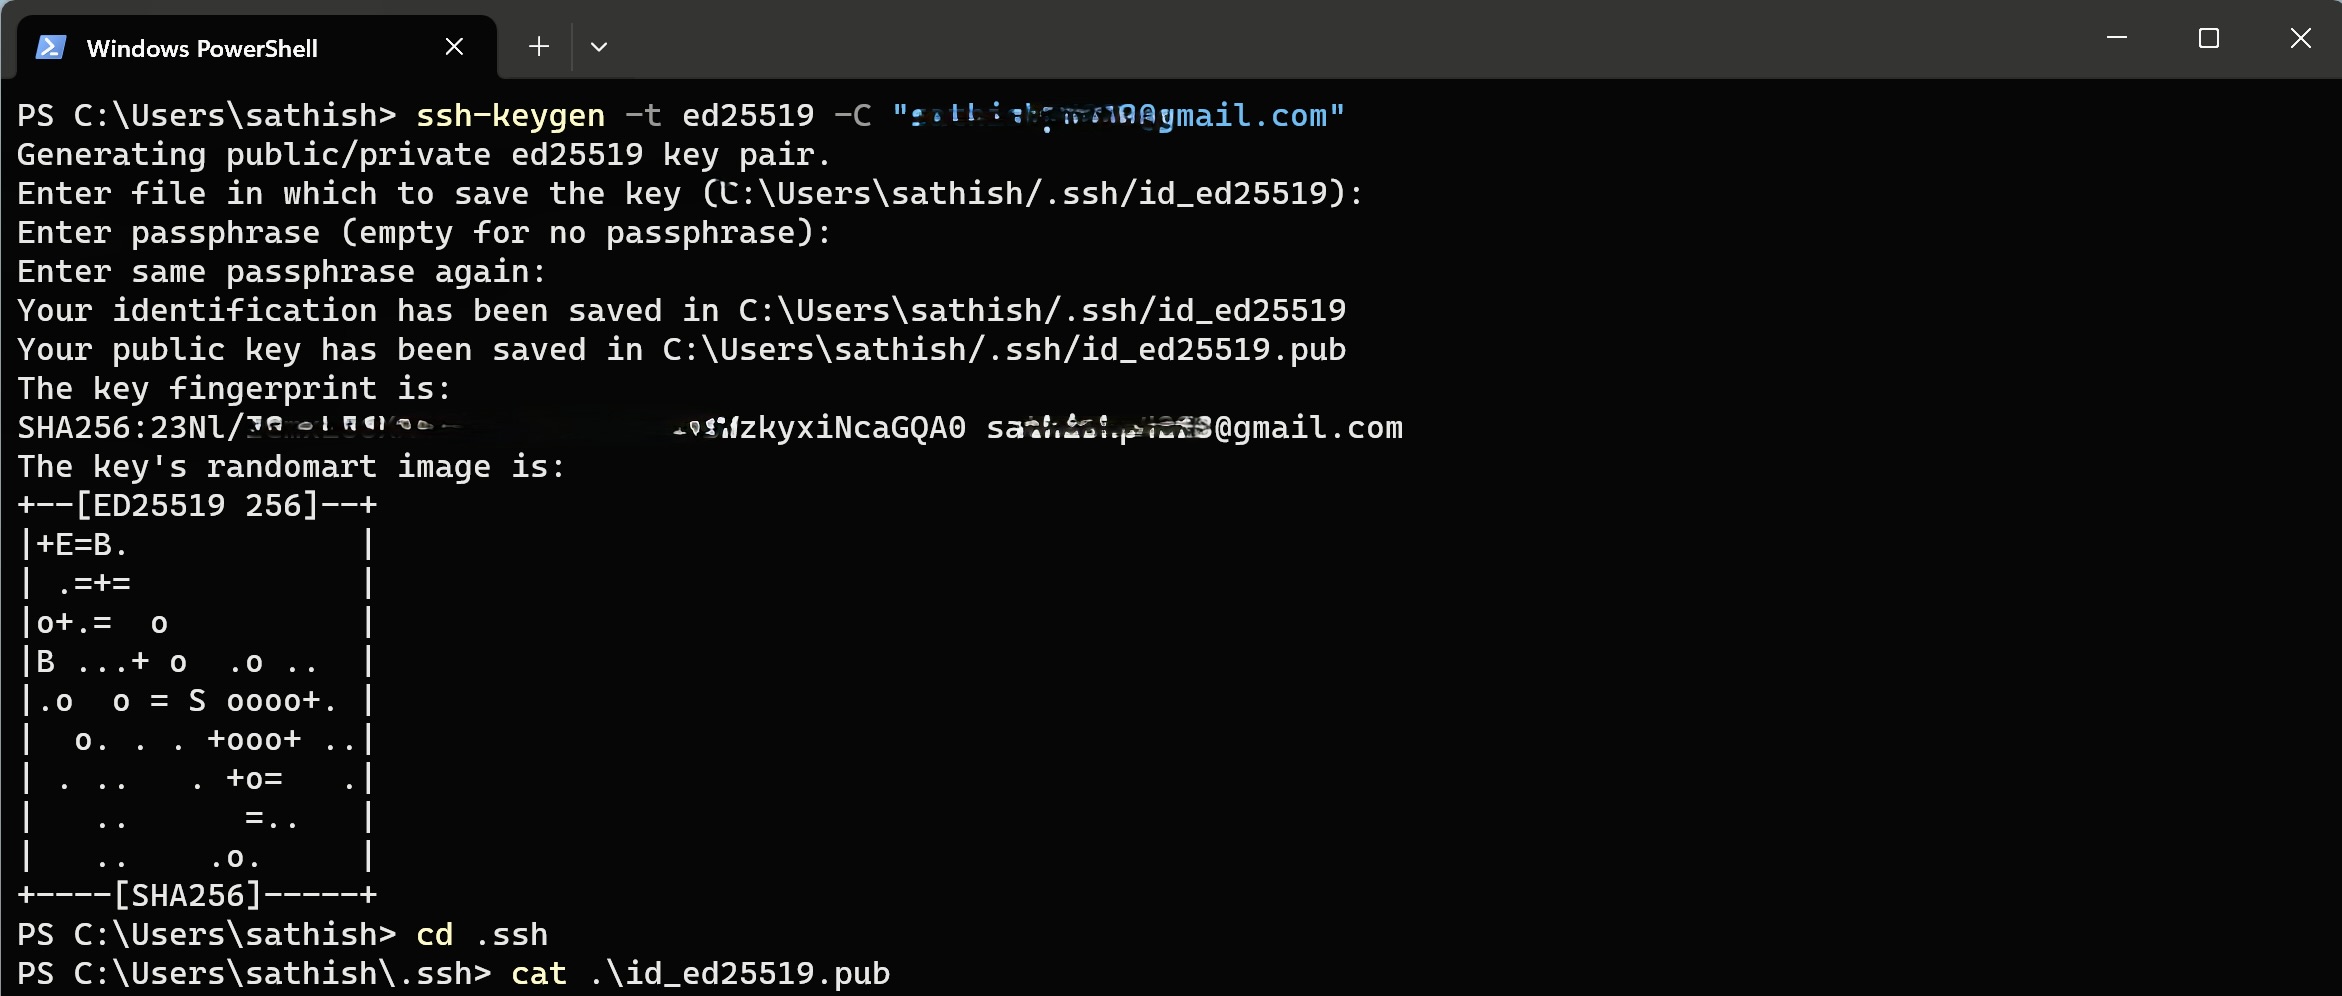
Step 2: Add Your SSH Public Key to Tom Lab
Next, you must provide Tom Lab with your public key. This is how our platform will recognize your computer. Use the following command in PowerShell to display your public key:
cat ~/.ssh/id_rsa.pub
Copy the entire key (starting with ssh-rsa...). In your Tom Lab account, go to My Account → SSH Keys and click Add new key. Paste the key you copied, give it a recognizable title like "My Windows PC", and save it.

Step 3: Set Up the WireGuard VPN
A secure VPN tunnel is required to reach your lab's private IP address. First, download and install the WireGuard application for Windows.
Once installed, go to the Connectivity → VPN section in your Tom Lab dashboard. Click Add Device, give it a name, and then click Download Config to get your unique configuration file.

Step 4: Activate the VPN Connection
Open the WireGuard application on your PC. Click the Import tunnel(s) from file button and select the .conf file you downloaded. A new tunnel will appear in the list. Click the Activate button next to it. The status will change to "Active", and the Tom Lab dashboard will show the device as "Online".

Step 5: Deploy the Lab and Connect
You're in the home stretch! Go to the Lab section and click Deploy. After a few moments, your lab will be running. The dashboard will update with live stats and provide the SSH Command.
Copy the SSH command. Paste it directly into your PowerShell terminal and hit Enter. If you set a passphrase, you will be prompted to enter it. Welcome to your lab!

Troubleshooting Common CLI Errors
If you have trouble connecting via SSH, check these common issues:
- Error:
Permission denied (publickey)
This means the server doesn't recognize your SSH key. Double-check that you copied the entire public key into the Tom Lab dashboard correctly.
- Error:
Connection timed out
This usually means your VPN is not working. Ensure the WireGuard tunnel status is "Active" on your PC. Also, check that your network's firewall isn't blocking the VPN connection.
- Error:
Host key verification failed
If you've redeployed your lab, its identity may have changed. Run this command in PowerShell to remove the old entry (replace the IP with your lab's IP):
ssh-keygen -R "172.40.0.3"
Pro Tip: Enhance Your Windows Terminal
For the best command-line experience on Windows, we recommend two things:
- Install Windows Terminal: Get it from the Microsoft Store. It's a modern app that supports tabs for PowerShell, Command Prompt, and more.
- Enable WSL (Windows Subsystem for Linux): This allows you to run a true Ubuntu terminal directly on Windows. Once enabled, you can follow our Ubuntu connection guide for a native Linux experience.
Connect Tom Lab - Ubuntu
A Step-by-Step Guide for Ubuntu Users
Need Help?
If you encounter any issues during the setup process, don't hesitate to reach out to our support team or consult the community forums. We're here to help you succeed!